In Tsurumi Island, players will encounter peculiar symbols. They’reIshine Scripts, which were used on the island a long time ago. Use thePeculiar Pinionto reveal these hidden symbols and solve an overarching Stone Slate puzzle on the island.
To start, you must firstcomplete the Octave of the Maushiro World Quest, which is the second part of the Through the Mists questline.

Note:For the purpose of this guide, each symbol has been associated with a number. This will be used to relay the Script order for all the puzzles.
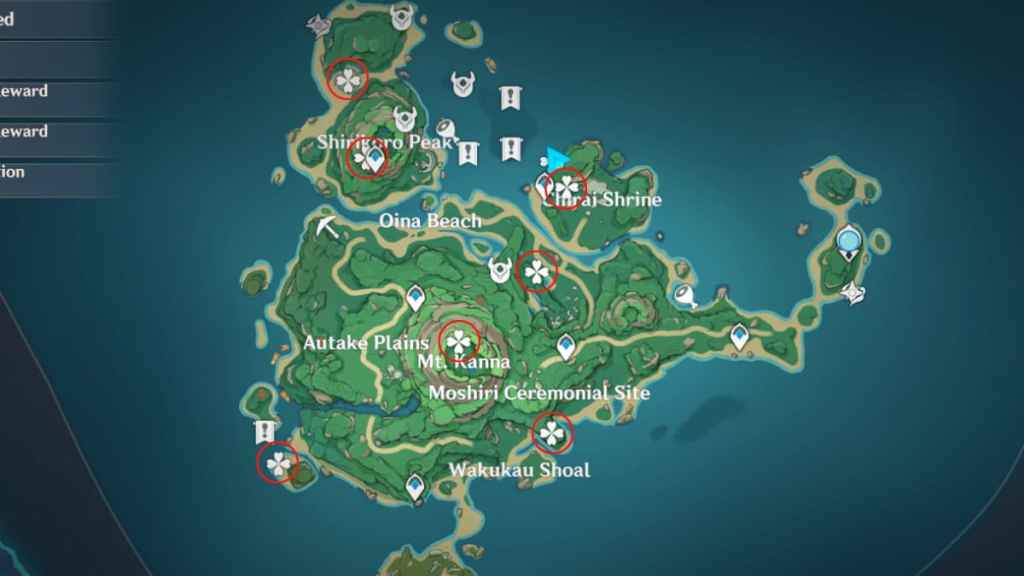
All Puzzle Locations
Reference to the map above for the exact location of all seven puzzles.
Chirai Shrine
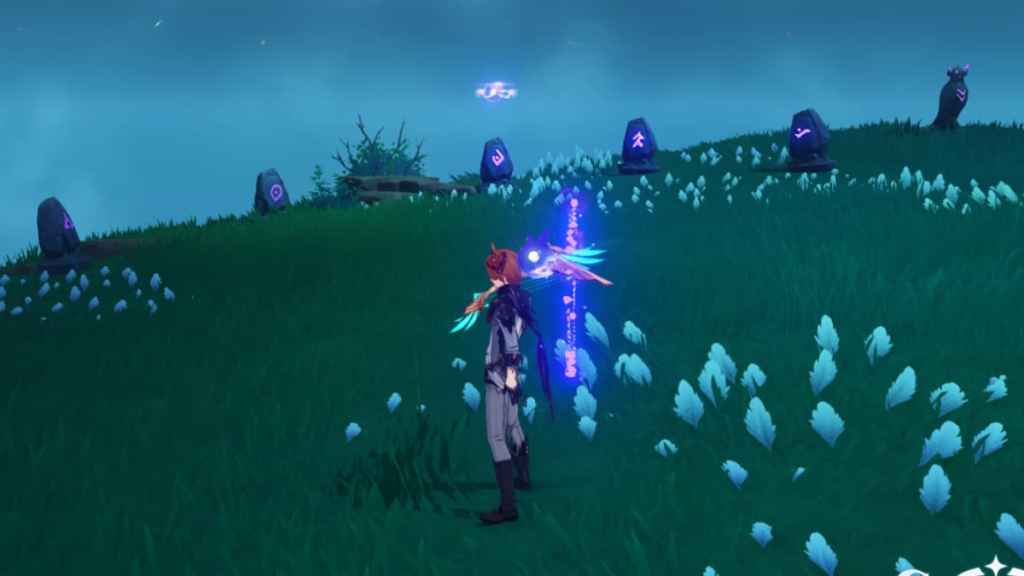
Head to the area near the ruin, where you’ll find a Thunderbird Statue. Use the Peculiar Pinion to prompt Ishine Script to appear on the nearby stones. After, head to the clearing containing a Relay Stone puzzle.
Related:How to solve all Tsurumi Island Relay Stone puzzles in Genshin Impact
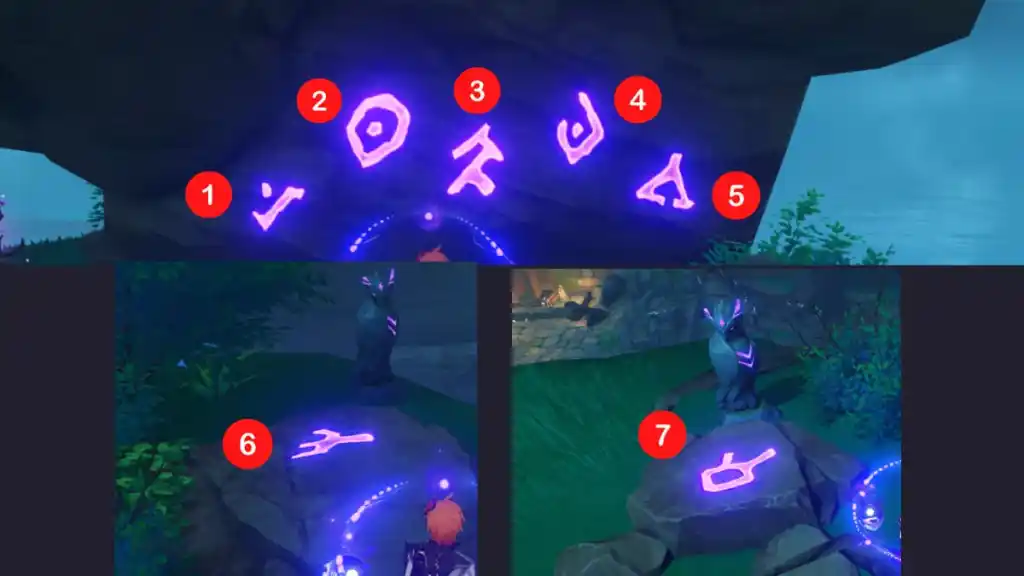
There, you’ll find another Thunderbird Statue. Use a Peculiar Pinion on it and a mechanism will appear. Interact with it to prompt Ishine Script to appear on the ground one by one. After, return to the first Thunderbird Statue and hit the stones in this order:6 > 4 > 3 > 5 > 2.
A Chest will appear after solving the puzzle—you mustopen it to obtain a Stone Slate.
South of Moshiri Ceremonial Site
Head to the location marked on the map. Use the Peculiar Pinion on the Thunderbird Statues to prompt symbols to appear on the stones, along with an Electro Seelie.
Follow the Electro Seelie to a narrow platform under a cliff, where you’ll find another Thunderbird Statue. Interact with it and symbols will appear on the wall in the same order that you must hit the stones in the puzzle’s location.
The exact order is1> 6 > 3 > 5 > 2. You’ll receive a Chest containing a Stone Slate.
Between Oina Beach and Chirai Shrine
Head to the area marked on the map, where you’ll find a Thunderbird Statue. Interact with it to prompt symbols to appear on the surrounding stones.
Look behind the Statue—there’s a narrow trail lined with a few Thunderbird Statues and landforms. Head to the very back and use the Peculiar Pinion on the glowing Thunderbird Statue to prompt symbols to appear on the nearby landforms.

Do the same for the rest of the Thunderbird Statues lined up. Follow the order of the symbols that appear from the very back all the way to the puzzle’s location and hit the stones in the same order (2 > 3 > 6 > 5 > 7). After, you’ll get a Chest containing a Stone Slate.
Related:Where to find the three feathers to make an offering to the perch – A Particularly Particular Author World Quest Guide
Cave Inside Mt. Kanna (Northern Part)
Head deep inside the cave in Mt. Kanna, where you’ll find a Thunderbird Statue. Interact with it to reveal three Seelies. Follow the Seelies, which will lead you to pick upx1 Mysterious Stoneeach.
Follow them back to the Thunderbird Statue, where anOpeninteraction will appear under each Seelie—place the Stones there and the three will fly behind you.
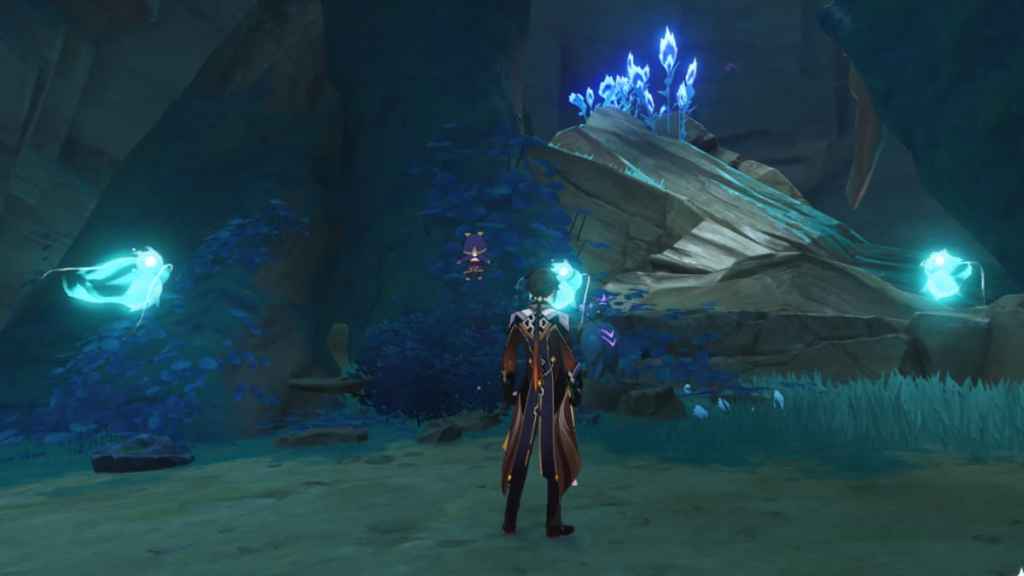
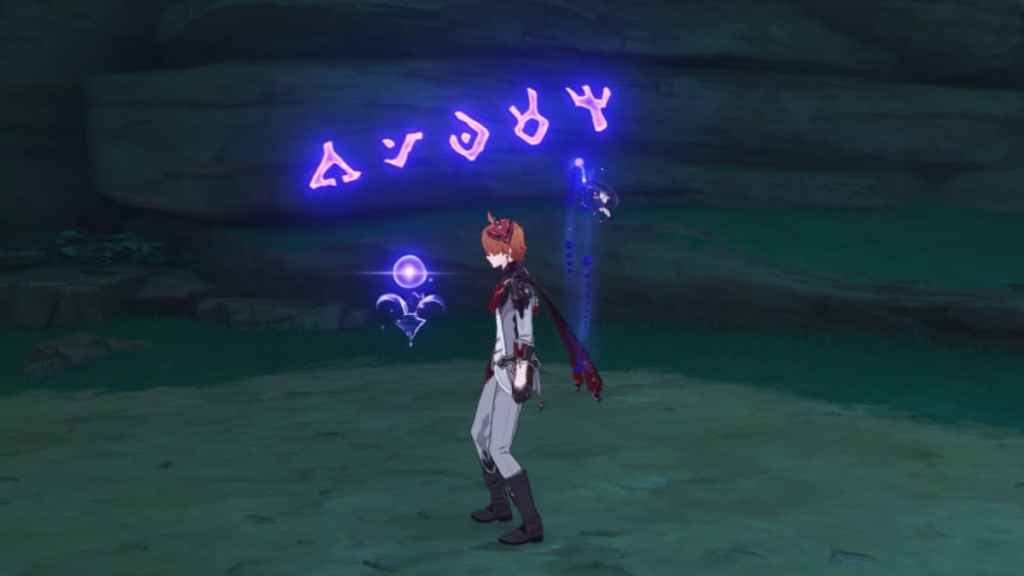
The Seelies will disappear into the wall, revealing the order of symbols to hit the stones with. Reference the image above to guide you. After completing the puzzle, a Chest will appear—with a Stone Slate inside.
Cave Inside Shirikoro Peak
Head to the Teleport Waypoint in Shirikoro Peak and fly down—you’ll immediately find an array of Thunderbird Statues. Interact with the one beside the stones to reveal the Ishine Script.
On its right, you’ll find another Thunderbird Statue beside a tombstone. Use the Peculiar Pinion to reveal one symbol. Do the same for four other Thunderbird Statues lining the vicinity to get the order of the symbols:4 > 1 > 2 > 3 > 7.
As always, hit the rocks in this order to complete the puzzle and open the Chest reward to get a Stone Slate.
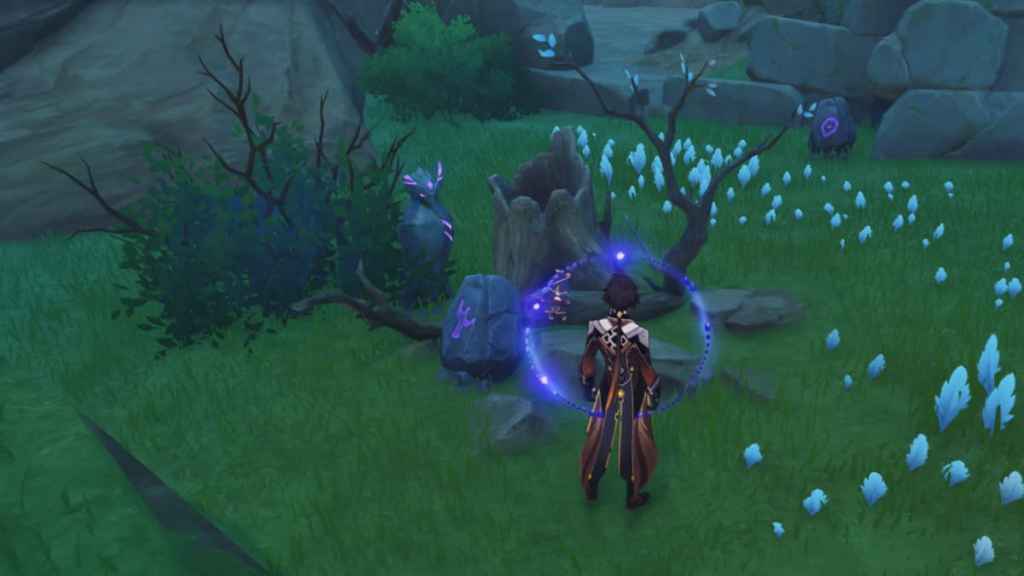
North of Shirikoro Peak
In the north of Shirikoro Peak, you’ll find a clearing with a Moving Stone puzzle. Your goal is to connect each stone with its corresponding landform. Start by using the Peculiar Pinion on the Thunderbird Statue to reveal all the symbols.
Move the stones in this exact order:
After completing this puzzle, you’ll receive a Chest containing a Stone Slate.
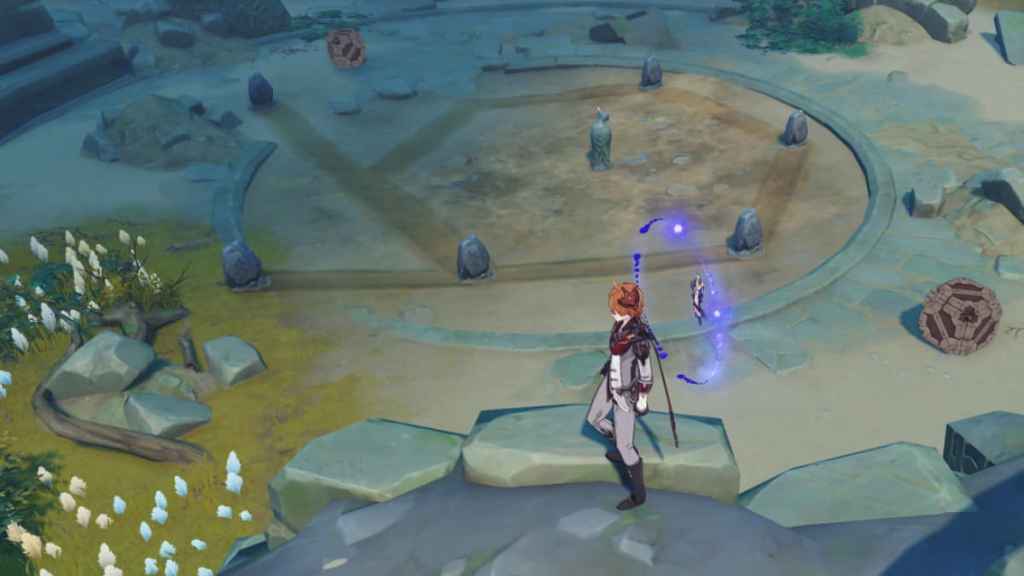
West of Wakukau Shoal
On the small island west of Wakukau Shoal, you’ll find another Moving Stone puzzle. Start by using the Peculiar Pinion on the Thunderbird Statue to reveal all the symbols. You need a lot of patience for this one!
Move the stones in the exact order below:
Complete the puzzle to get a Chest containing a Stone Slate.
Completing The Hidden Puzzle
With all seven Stone Slates in your Quest Item Inventory, head to the area marked above to complete the last leg of this hidden puzzle. Keep in mind that while the area looks close to Chirai Shrine, it’s actually underwater—so you need toaccess it through the cave deep within Shirikoro Peak.
There, you’ll find an enclosure with seven strange statues surrounding it. Interact with the statues and place one Stone Slate in each of them—put in all seven, and the puzzle will finally complete.

Completing this puzzle will reward you with two Luxurious Chests and will unlock the AchievementSeven Letters.
Check out our guide onHow to complete the Octave of the Maushiro World Quest in Genshin Impactto unlock this hidden puzzle.